Gravel for Shed Base: Pick, Prep, and Install Right
O'Leary Development GroupAugust 4, 2026
Discover the best gravel for shed base. Learn how to choose, prep, and install for optimal drainage and stability. Build it right!
San Antonio’s Go-To Material Supplier
Get a Free Per-Load Quote Today
Same-day delivery available · Transparent pricing · Licensed & insured
The best gravel for a shed base is 3/4-inch angular crushed stone, sold at most yards as #57 stone or crusher run, installed to a compacted depth of 4–6 inches. That single choice handles drainage, locks under load, and gives you a level surface that won’t shift when the shed is full.
Two quick decision points before you order:
Choose crusher run when maximum compaction is the priority — heavy workshop sheds, clay soil, or any site where the ground moves. The stone dust (fines) in crusher run binds the aggregate into a near-solid mass.
Choose #57 washed stone when drainage is the bigger concern — sandy or loamy soil, sites with seasonal standing water, or anywhere you need water to pass through quickly rather than pond under the floor.
Before you break ground: lay woven geotextile fabric under the stone, call 811 to locate buried utilities, check local setback rules, and size your pad 12 inches wider than the shed footprint on every side.
Not all stone is equal, and the wrong choice costs you twice: once to buy it and again to fix the settling. Here is how the four most common options stack up.
Material
Drainage
Compaction & Stability
Typical Cost
DIY Friendliness
Best Use Case
Maintenance
#57 crushed stone (3/4" washed)
Excellent
Good
—
Easy to spread
Most residential sheds, wet sites
Minimal; occasional top-dress
Crusher run / road base
Moderate
Excellent
—
Moderate (needs compactor)
Heavy sheds, clay soil, high-load sites
Re-compact if edges erode
Pea gravel
Good
Poor
—
Easy
Decorative perimeter only
Migrates; needs edging
Washed river rock / round stone
Good
Poor
—
Easy
Decorative only
Migrates constantly
#57 stone is the go-to for most homeowners because it drains fast and is forgiving to spread. Crusher run compacts to a higher density because of the fines mixed in with the coarser aggregate, which is exactly what you want under a heavy structure.
Pea gravel and rounded river rock are a firm no for the structural base. Their smooth, rounded shapes prevent the particles from interlocking, so the stone rolls under load instead of locking in place. Round aggregate should be limited to decorative surfacing, not load-bearing applications. If you want a clean look around the perimeter, pea gravel works fine as a top-dress border once the structural base is in.
Pro Tip:On sites where both stability and drainage matter, layer them: crusher run on the bottom 3–4 inches for a locked sub-base, then 2 inches of #57 on top for drainage. The combination outperforms either material alone.
How much gravel do you need for your shed pad?
The target finished depth after compaction is several inches. Because gravel compresses roughly 10–15% under a plate compactor, you need to order more loose material than the finished depth suggests. A 6-inch finished depth requires about 6.6–6.9 inches of loose stone before compaction.
The standard volume formula:
(Pad length multiplied by pad width and depth in feet) divided by 27 gives the volume in cubic yards
Then add 10% for compaction and waste.
Worked example: 10×12 shed
The shed is 10×12 feet. Add about a foot on every side, so the pad becomes approximately 12×14 feet, with a loose depth that accounts for compaction.
12 × 14 × 0.5 = 84 cubic feet
84 ÷ 27 = 3.1 cubic yards
Add 10% buffer: 3.4 cubic yards to order
Crushed stone weight varies, but a typical bulk density corresponds to several tons for a few cubic yards.
Common pad sizes at a glance
Common pad sizes extend beyond the shed footprint with volumes and costs depending on size and local pricing.
Cost ranges reflect typical bulk delivered pricing. Ordering in bulk cuts cost dramatically compared to bagged stone from a home center, where a single 0.5 cubic foot bag runs $5–$7. Bagged stone for a 10×12 pad would cost three to four times more than a bulk delivery.
Order by the cubic yard or ton from a local landscape supplier or materials hauler.
Always confirm whether the supplier quotes by weight (tons) or volume (yards) before ordering.
Round up, not down. Running short mid-project means a second delivery charge.
How to build your gravel shed pad step by step
Pre-work checklist
Before any digging:
Call 811 at least three business days before you dig. It is free, required by law in every state, and prevents hitting a gas or electrical line.
Check local setback ordinances. Most municipalities require sheds to sit at least 5 feet from property lines, though this varies.
Confirm whether your shed size requires a permit. Many jurisdictions trigger permit requirements at 100–200 sq ft.
Gather tools: plate compactor (rent one for $75–$120/day), hand tamper, metal rake, round-point shovel, string line and stakes, 4-foot level, and a tape measure.
Buy materials: 3/4-inch crushed stone or crusher run (calculated above), woven geotextile fabric, and treated timber or metal edging if you want a contained border.
Excavation
Strip all grass and topsoil from the pad area. Organic material compresses and rots under load, so it has to go. Dig to a consistent depth across the entire pad. On a flat site, 6–8 inches of excavation gives you room for the fabric, the stone lifts, and a slight crown. On a slope, cut into the high side and fill the low side, then compact the fill soil before laying fabric.
Fabric and edging
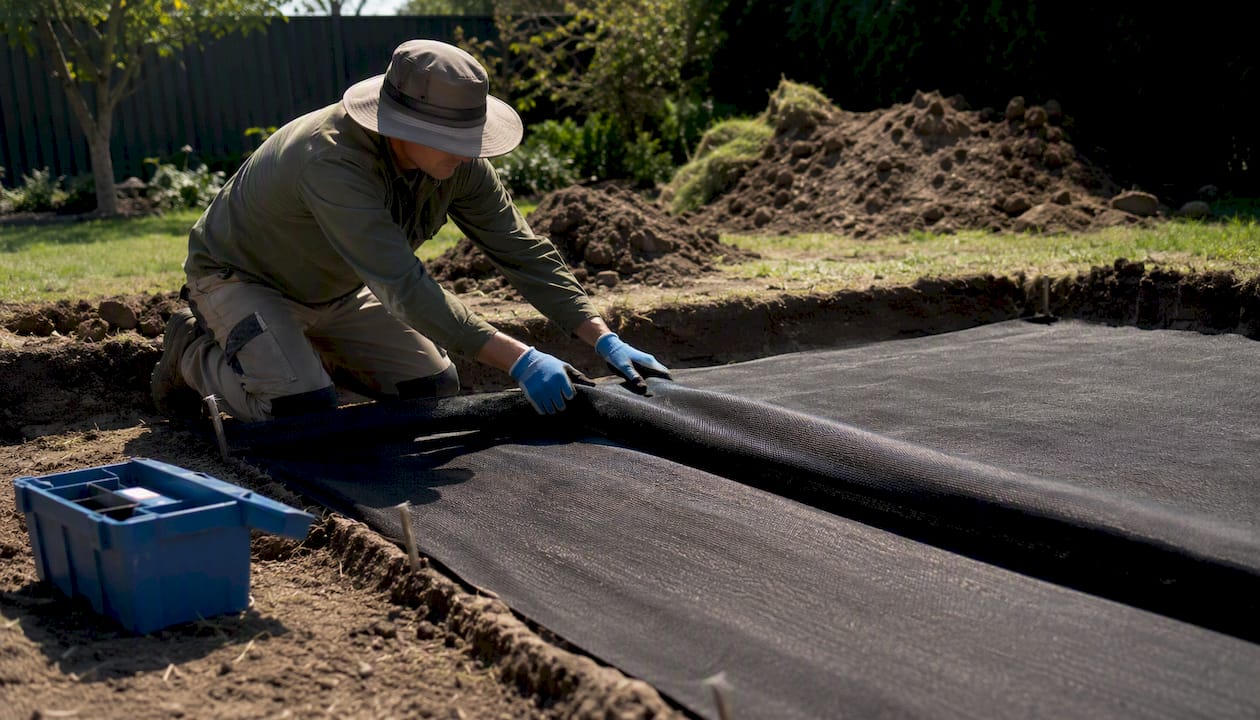
Lay a heavy-duty woven geotextile fabric across the entire excavated area. Woven fabric separates the stone from the subsoil while still letting water pass through. Non-woven landscape fabric and thin plastic sheeting both fail here: plastic traps water, and non-woven fabric tears and allows fines to migrate up into the stone over time. Overlap seams by at least 12 inches and secure edges with fabric staples. If you are using treated timber or steel edging, set it now and check it for level before adding stone.
Ready to Order?
Call Now: 210-983-8005
Same-day delivery available on most orders in San Antonio and surrounding cities
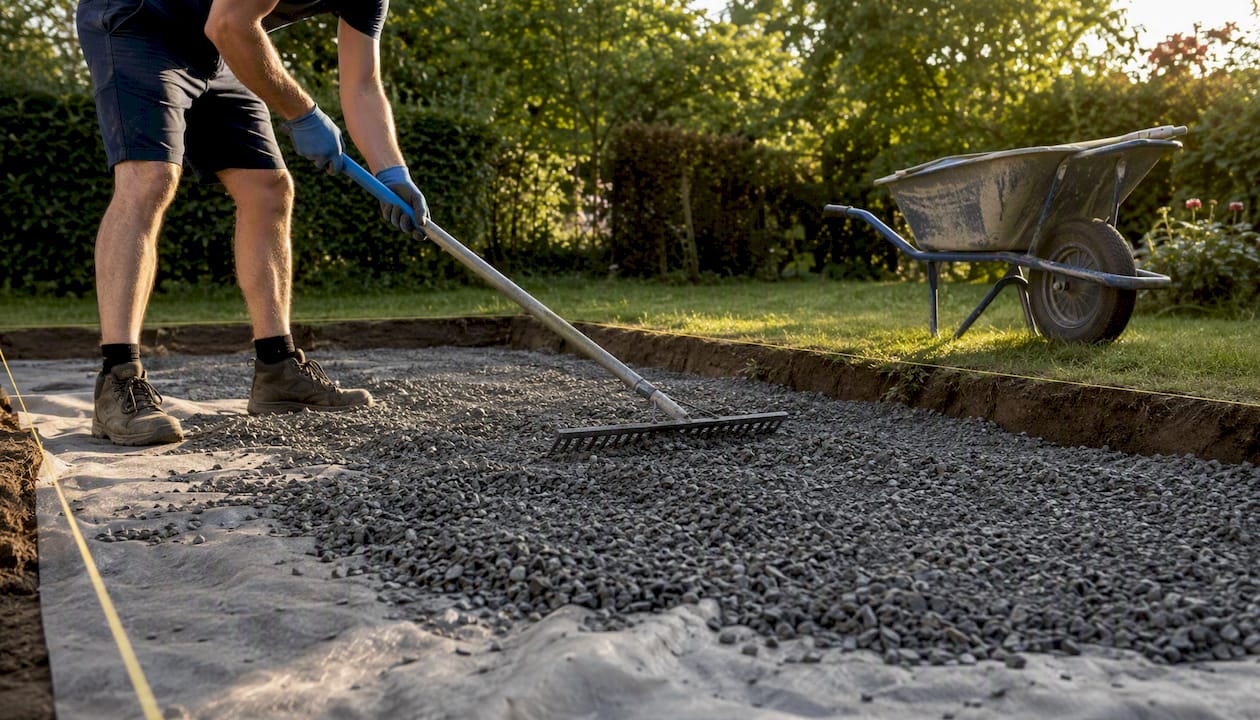
This is where most DIY pads fail. Dumping all the stone at once and running a compactor over the top does not work. The plate compactor only reaches the top few inches, leaving the bottom loose.
Spread the first 2–3 inch lift evenly across the pad.
Dampen the stone lightly if it is very dry. A little moisture helps the fines bind.
Make two to three passes with the plate compactor, overlapping each pass by half.
Add the second lift and repeat.
After the final lift, screed the surface with a long board or metal pipe to level it, then do a final compactor pass.
Compact in lifts, not all at once. Skipping layered compaction leads to deep, uneven settlement under load — the kind you notice six months later when the shed door won’t close.
Check level across multiple diagonal points before calling it done. A 4-foot level should show no more than 1/4 inch of variation across the pad.
Pro Tip:Rent the plate compactor for a full day even if you think you’ll finish in two hours. Rushing compaction is the single most common reason gravel pads settle unevenly.
Finish steps
Set skids or floor frame onto the compacted pad and check level again after the structure’s weight is on it. Add a perimeter top-dress of clean stone around the border. Each spring, check for any edge erosion or low spots and top-dress with a thin layer of matching stone.
Safety note: Wear steel-toed boots and eye protection when operating a plate compactor. Keep bystanders clear. When a bulk delivery arrives, direct the driver carefully and never stand behind the truck during unloading.
How do you keep water away from your shed foundation?
A flat pad is not enough. Water that pools under a shed floor accelerates rot and attracts pests. The pad itself needs to shed water, not collect it.
Slope the finished pad surface 1–2% away from the shed on all sides. Over a 12-foot pad, that is roughly 1.5–2.5 inches of drop from center to edge.
The 12-inch perimeter extension beyond the shed footprint keeps roof drip-line runoff from hitting bare soil right at the floor joists.
Add splash guards or gravel-filled channels along the drip line if your roof has no gutters.
On wet sites or heavy clay, go to a full 6-inch compacted depth and consider a 3–4 inch crusher-run sublayer before the #57 top layer. For a heavy workshop or a site with a high water table, a concrete slab is worth the extra cost.
Pro Tip:During construction, check drainage by running a garden hose on the pad for two minutes. Water should sheet off the edges within 30 seconds. If it pools anywhere, regrade that spot before the shed goes on.
For sites with persistent standing water, a perforated sub-drain pipe wrapped in filter sock and bedded in drainage rock along the uphill edge of the pad can redirect groundwater before it reaches the stone base.
Common mistakes that ruin a gravel shed base
The five fastest ways to wreck a shed foundation: using round pea gravel as the structural base, skipping geotextile fabric, poor or no compaction, insufficient depth (under 4 inches), and failing to check utilities and setbacks before digging.
Most of these failures are not obvious until the shed has been sitting for a season or two. By then, fixing them means moving the shed.
If your pad is already settling unevenly:
Small low spots (under 1 inch): top-dress with matching crushed stone, wet lightly, and re-compact with a hand tamper or rented plate compactor.
Edge erosion: install treated timber or steel edging, backfill with compacted stone, and check that the perimeter slope is directing water away.
Weed growth through the base: the fabric was either skipped or was non-woven. Pull the shed, remove the stone, lay proper woven geotextile, and reinstall.
Joist sag or floor bounce: the pad depth was insufficient. A partial rebuild, adding 2–3 inches of compacted stone, usually resolves it if the subsoil is stable.
When a pad has settled more than 2 inches unevenly, or when the subsoil is visibly soft or wet after excavation, a full rebuild with a deeper crusher-run sublayer is the right call. A top-dress alone will not fix a structural problem.
Why professionals use full compacted gravel pads
A full compacted gravel pad provides uniform bearing across the entire shed floor, which is something isolated pier blocks cannot match. With piers, the floor joists span between support points and flex under load. Over time, that flex causes sagging, squeaking floors, and doors that bind. A continuous gravel pad eliminates those localized stress points entirely.
When to hire a professional for site prep or delivery:
Sheds larger than 200 sq ft, where compaction uniformity matters more and a plate compactor alone may not be enough.
Clay soil or a high water table, where an engineered sub-base may be needed to prevent frost heave and lateral movement.
Steep slopes requiring cut-and-fill work beyond a shovel and wheelbarrow.
Any site where excavation equipment or a large delivery truck cannot access easily.
A typical contractor workflow runs: stake the pad, excavate with a skid steer, lay fabric, deliver and spread stone in two lifts, compact with a ride-on or walk-behind compactor, and final-grade. The whole job on a 10×12 pad takes a half-day with the right equipment. Frost depth also matters for larger permanent structures; IRC R403.1.4 provides footing guidance for cold-climate regions where a 12-inch gravel pad alone may not be sufficient.
Schedule Delivery in Minutes
Get Your Free Quote Today
Tell us your location, access, and estimated yardage — we’ll handle the rest
The real argument for a pro on a large shed: speed and compaction quality. A contractor with a ride-on compactor achieves consistent density across the entire pad in one pass. A homeowner with a rented walk-behind takes three times as long and may still miss spots near the edges.
Pro Tip:Whether you DIY or hire out, the material delivery is the same: bulk crushed stone by the ton or cubic yard. Olearydevelopmentgroup delivers crusher run, 3/4-inch crushed stone, and road base directly to your site in the San Antonio area, with same-day and next-day options available.
Key Takeaways
The most durable gravel shed base uses 3/4-inch angular crushed stone or crusher run, compacted to 4–6 inches on a woven geotextile fabric, with the pad extending 12 inches beyond the shed footprint on every side.
Point
Details
Best material
Use 3/4" angular crushed stone (#57) for drainage or crusher run for maximum compaction.
Compacted depth
Target 4–6 inches after compaction; order 10–15% more loose material to account for compression.
Pad sizing
Extend the pad 12 inches beyond the shed footprint on all sides to manage roof drip-line runoff.
Fabric is non-negotiable
Lay woven geotextile fabric under all stone; non-woven landscape fabric and plastic sheeting both fail.
Olearydevelopmentgroup
Delivers bulk crusher run and crushed stone to San Antonio-area sites with same-day/next-day scheduling.
The part most guides skip
There is a gap between what the plan-only articles tell you and what actually happens on delivery day. Getting the material to the site correctly staged is half the job.
When a dump truck arrives with 5 tons of crushed stone, it needs a clear, straight run to the pad area. The truck bed raises and the stone slides out in a pile roughly 6–8 feet wide and 3–4 feet tall. If the truck cannot get within 20–30 feet of the pad, you are moving that pile by wheelbarrow, which adds hours to the job.
Before the truck arrives: pull any vehicles out of the driveway, mark the pad corners with stakes and string so the driver knows exactly where to drop the load, and confirm the total tonnage with the supplier the day before. A short driveway or a tight gate is worth mentioning when you book the delivery. Most experienced haulers can work around obstacles, but they need to know in advance.
For very small pads (an 8×8 shed, for instance), bagged stone from a home center is genuinely worth considering if truck access is impossible. But for anything 10×10 and larger, bulk delivery costs less and saves a full day of carrying bags. The math is not close.
Bulk gravel delivery for your shed project in San Antonio
Olearydevelopmentgroup stocks the materials this guide recommends: crusher run, 3/4-inch crushed stone, and road base, all available for bulk delivery across the San Antonio area. Skip the bagged-stone math and the multiple hardware store trips. One call or online quote request gets the right material dropped at your pad location, in the volume you calculated above.
Same-day and next-day delivery slots are available for most orders, and contractor accounts include net-30 invoicing for repeat projects. The dump truck hauling service covers Greater San Antonio and surrounding cities, with GPS-tracked fleets and transparent per-load pricing so you know exactly what you are paying before the truck rolls.
3/4-inch angular crushed stone (#57) is the best all-around choice for most residential sheds because it drains well and locks under load. On clay soil or for heavy workshop sheds, crusher run gives better compaction due to its stone-dust fines.
How much gravel do I need for a 10×12 shed base?
A 10×12 shed needs a 12×14-foot pad at 6 inches deep, which works out to roughly 3.4 cubic yards including a 10% compaction buffer.
What is the cheapest way to base a shed?
A compacted gravel pad is one of the most cost-effective shed foundations. Ordering bulk crushed stone by the ton from a local supplier costs significantly less than bagged stone and far less than a poured concrete slab.
How deep should the gravel base for a shed be?
The standard compacted depth is 4–6 inches for residential storage sheds. Order about 10–15% extra loose material to account for compaction.
Do I need fabric under the gravel?
Yes. A woven geotextile fabric keeps the stone from sinking into the subsoil over time and allows water to drain through. Non-woven landscape fabric and plastic sheeting are not adequate substitutes for this application.