Parking Lot Gravel: Best Types, Depths & Costs (2026)
O'Leary Development GroupJuly 31, 2026Updated August 1, 2026
Discover the best types, depths, and costs of parking lot gravel. Ensure durability and performance with our expert insights. Click to learn more!
San Antonio’s Go-To Material Supplier
Get a Free Per-Load Quote Today
Same-day delivery available · Transparent pricing · Licensed & insured
Use an angular crushed-stone structural base with a compacted 6–8 inch flex base for commercial and light-truck traffic, topped with a clean #57 or #411 angular stone for drainage and traction. That two-layer system is the industry standard, and skipping either layer is the single most expensive mistake a property owner can make.
For most commercial lots, the build looks like this:
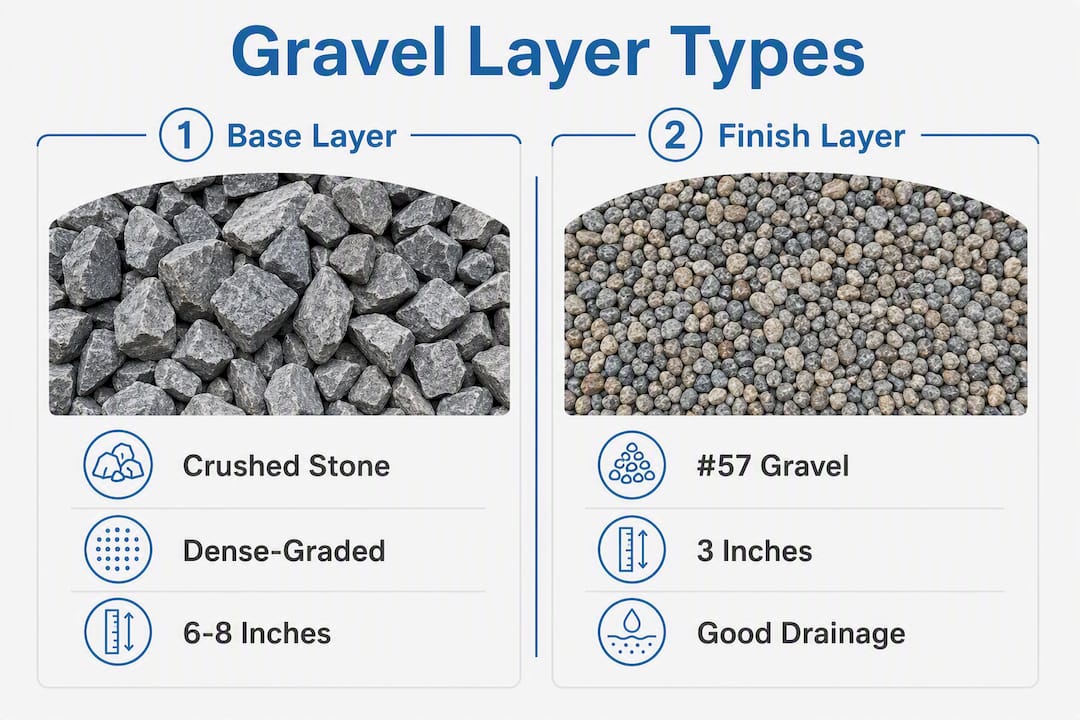
Base layer: 6–8 inches of compacted crush-and-run or road base (dense-graded, angular). Push to 8+ inches when semi-trucks or heavy equipment will use the lot regularly.
Surface layer: 1.5–3 inches of clean #57 or #411 angular stone for traction, drainage, and appearance.
Stabilization: When subgrade soil is soft, clay-heavy, or wet, pair a geotextile fabric or geocell system with your base to hit required load capacity with less material.
Before you order anything, confirm three things: expected traffic type and axle weight, soil conditions at the site, and whether you need a permit for impervious cover or stormwater management. Those three answers drive every material and depth decision that follows.
Professionals specify a two-stage system: a dense-graded structural base that compacts into a locked, load-bearing mass, and a clean angular top-dress that sheds water and gives tires grip. Using one material for both roles leads to rutting, drainage failure, or both.
Material
Best For
Particle Size
Drainage
Compaction
Maintenance Notes
Crusher run / road base
Structural base layer
Mixed fines to 1.5"
Low (dense-graded)
Excellent
Locks tight; re-grade if surface erodes
#3 or #4 base rock
Sub-base on stable soil
1.5"–2" angular
Good
Moderate
Needs fines cap to prevent punch-through
#57 crushed stone
Top-dress / finish layer
~3/4" angular
Excellent
Low (open-graded)
Replenish every 3–7 years
#411 fines mix
Finish layer with firmer feel
3/4" + fines
Moderate
Good
Firms up over time; less migration
Recycled concrete
Base layer on budget projects
Variable
Moderate
Good
Check for contamination; avoid near drainage
Slag
Alternative base or finish
Variable
Good
Moderate
Durable; confirm local availability
Pea gravel
Decorative only
3/8"–1/2" round
Excellent
None
Rolls under tires; never use as structural surface
Crushed limestone flex base compacts dense and is the most commonly specified commercial base material in Texas and the Southeast. #57 stone (3/4" angular) is the standard top-dress because it drains freely and resists displacement better than rounded alternatives.
Avoid as sole structural materials: Pea gravel and round river rock both roll under load. They have no angular interlock, so they migrate outward under tire pressure and create soft spots almost immediately. Pea gravel works for decorative borders or drainage channels, not as a load-bearing surface.
Pro Tip:When budget is tight, never cut the base depth to save money on finish stone. A thinner top-dress is recoverable; a thin base creates ruts that cost more to fix than the original savings.
How thick should each layer be?
The direct prescription for a standard commercial lot: geotextile fabric on any soft or clay subgrade, then 4–8 inches of compacted flex base placed in 4-inch lifts, then an optional 1–2 inch transition layer of #4 base rock, then 1.5–3 inches of #57 or #411 finish stone.
Heavy trucks / semi-trailers / equipment yards: 8+ inches compacted base, engineered subgrade prep, geocell or geotextile reinforcement
Each layer’s job:
Subgrade prep: Strip topsoil, proof-roll, and correct soft spots with engineered fill before placing anything else. Skipping this step causes differential settlement.
Geotextile fabric: Woven geotextile separates base aggregate from soft subgrade soil, preventing the two from mixing over time. Strongly recommended on clay or wet sites.
Structural base: Dense-graded crush-and-run or road base, compacted in 4-inch lifts. This layer carries the load.
Transition layer: Optional coarser aggregate (e.g., #4 base rock) between the dense base and open-graded finish stone to prevent fine particles from migrating upward.
Finish stone: Open-graded #57 or #411 for drainage, traction, and surface appearance.
Pro Tip:On very soft soils, high groundwater sites, or lots that will see frequent heavy equipment, bring in a geotechnical engineer before you spec the base depth. The cost of a soil report is a fraction of what a failed base costs to rebuild.
Layer
Material
Compacted Depth
Function
Subgrade
Native soil, corrected
N/A
Load transfer to earth
Separation
Woven geotextile
N/A
Prevents aggregate migration
Structural base
Crush-and-run / road base
6–8" commercial
Primary load bearing
Transition (optional)
#4 base rock
1–2"
Prevents punch-through
Finish surface
#57 or #411
1.5–3"
Drainage, traction, appearance
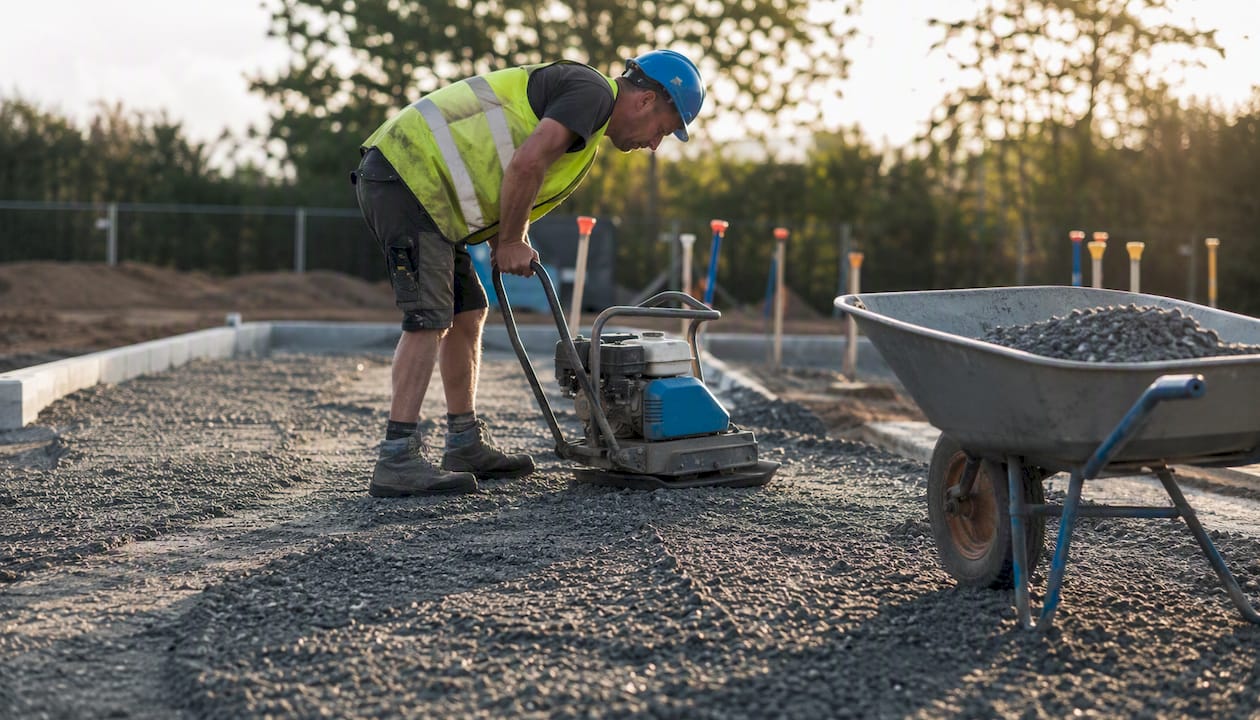
Compaction in 4-inch lifts using a plate compactor or vibratory roller is non-negotiable. Uncompacted gravel typically settles 1–2 inches within months, leaving you with a surface that ruts and drains poorly.
Step-by-step installation for a gravel parking lot
Start with this: every installation failure traces back to one of three causes — inadequate base depth, skipped compaction, or no edge containment. Get those three right and the rest is straightforward.
Sequential installation steps:
Survey and mark the lot. Stake perimeter, mark drainage direction, and confirm slope (target 1–2% cross-slope or crown for drainage).
Excavate to design depth. Remove topsoil and organic material. Typical excavation depth is 10–14 inches total (base + finish + settling allowance).
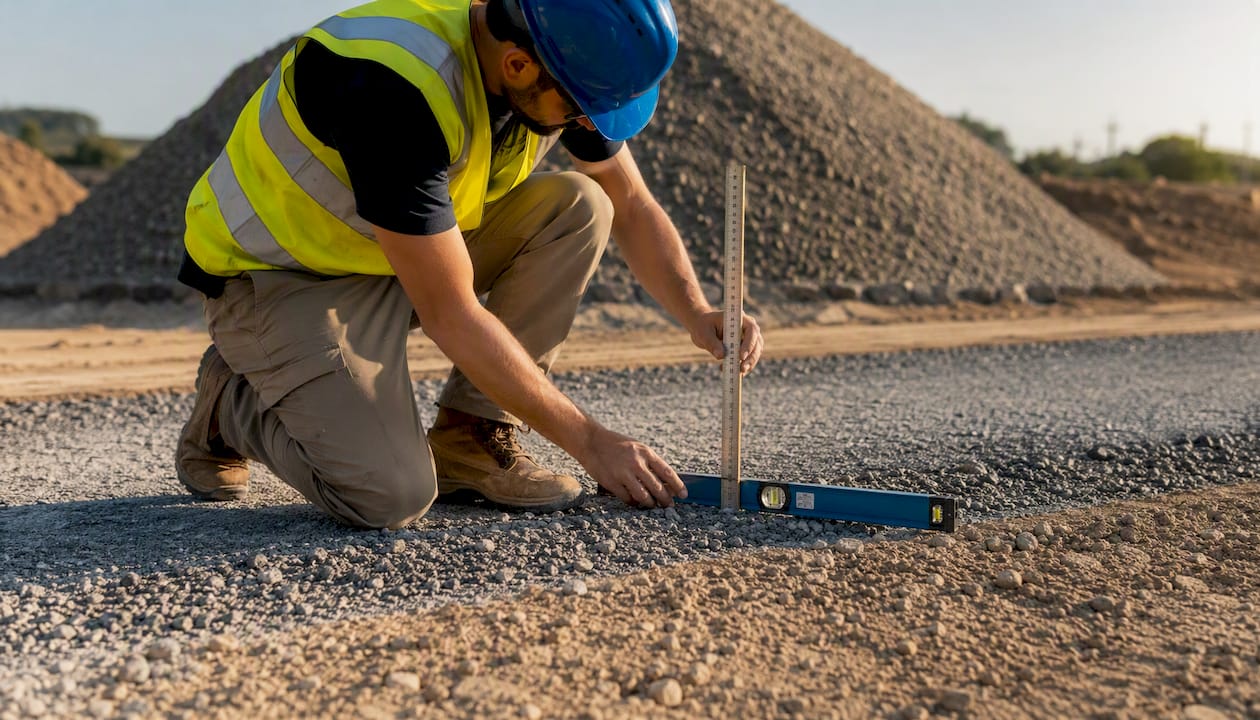
Proof-roll the subgrade. Drive a loaded dump truck across the surface. Soft spots that deflect more than an inch need correction with engineered fill or lime stabilization.
Install geotextile fabric. Overlap seams by 12–18 inches on clay or wet subgrades.
Place base in 4-inch lifts. Spread, then compact each lift before placing the next. Compact until the stone no longer moves under the compactor.
Grade for crown or cross-slope. A 2% slope sheds water; a flat lot pools water and accelerates base failure.
Install edge restraints. Timber, concrete curb, or steel edging prevents lateral migration of base and finish stone. No edge restraint means the lot spreads outward over time.
Place and compact finish stone. Spread #57 or #411 to 1.5–3 inches and do a light compaction pass.
Final inspection. Check slope, look for low spots, confirm drainage outlets are clear.
Equipment you need: excavator or skid steer, plate compactor or vibratory roller, motor grader or box blade, dump truck for material delivery, and a transit level or laser for grade checks.
Common mistakes that cause failures:
Ready to Order?
Call Now: 210-983-8005
Same-day delivery available on most orders in San Antonio and surrounding cities
Under-depth base (the most common and most expensive error)
Skipping compaction passes between lifts
No crown or cross-slope — water pools and softens the base
No edge restraint — stone migrates laterally within one season
Using decorative round stone as a structural surface
Staging finish stone before base is compacted, causing contamination
Pro Tip:Schedule your compaction crew and equipment to arrive the same day as material delivery. Letting base material sit uncompacted for days before rolling it allows it to partially set in a loose state, which reduces final density.
Post-installation troubleshooting:
Ruts: Usually indicate under-compacted base or insufficient depth. Add base material and recompact.
Washouts: Check crown slope and drainage outlets. Regrade and add finish stone.
Low spots: Topdress with matching finish stone and compact lightly.
How much gravel do you need and what will it cost?
Calculate your quantity first. The formula: (Length × Width × Depth in feet) ÷ 27 = cubic yards. Then multiply by the material’s weight factor (crush-and-run runs roughly 1.4–1.5 tons per cubic yard; #57 stone runs about 1.3–1.4 tons per cubic yard). Add 10–25% for compaction and settlement.
Example calculation for a 50×100 ft commercial lot:
Base layer at 6 inches (0.5 ft): 50 × 100 × 0.5 ÷ 27 = 92.6 cubic yards of crush-and-run. At 1.45 tons/cy × 1.15 compaction factor = ~155 tons delivered.
Finish layer at 2 inches (0.167 ft): 50 × 100 × 0.167 ÷ 27 = 30.9 cubic yards of #57. At 1.35 tons/cy = ~42 tons delivered.
Cost ranges (2026 planning estimates):
Cost Item
Low
Mid
High
Basic single-layer gravel surface
$15/ton
$35/ton
$75/ton
Bulk gravel material (per ton)
$15/ton
$35/ton
$75/ton
Delivery per load
$50
$150
$150
Sources: Project Cost Pro 2026 planning ranges
What drives cost up:
Material type (limestone base vs. specialty crushed stone)
Delivery distance from the quarry or yard
Site prep complexity (soft soil, tree removal, drainage work)
Compaction labor and equipment mobilization
Short-load fees on partial truck orders
Ordering checklist:
Specify material by name and gradation (e.g., “dense-graded crush-and-run” or “#57 crushed limestone”).
Order in tons, not cubic yards, to avoid volume discrepancy disputes.
Include a 15% compaction allowance in your tonnage request.
Confirm truck type (end-dump vs. belly-dump) and tipping location before delivery.
Ask about short-load fees — partial loads often carry a surcharge of $50–$150.
Get lead time in writing; same-day delivery is available from some local suppliers.
Buying full truck loads whenever possible cuts per-ton cost significantly. A partial load that triggers a short-load fee can cost more per ton than a full delivery.
How long does a gravel lot last, and what maintenance does it need?
A properly built gravel parking lot lasts 10–20 years with scheduled maintenance. The key word is “scheduled.” Lots that get no attention fail in 3–5 years; lots that get annual attention routinely outlast that range.
Maintenance schedule:
After every major storm: Check drainage outlets and culverts. Clear any blockage before the next rain event.
Quarterly: Walk the lot and flag ruts, low spots, or areas where stone has migrated to the perimeter.
Annually: Regrade with a box blade or motor grader to restore crown. This single task does more for lot longevity than any other maintenance step.
Every 3–7 years: Topdress with 1–2 inches of matching finish stone to replenish material lost to displacement and compaction.
Common maintenance tasks and approximate costs:
Regrading (motor grader, 1–2 hours): $200–$600 per visit depending on lot size and local rates
Topdress material (per ton, delivered): $35–$75 depending on material type and distance
Drainage repair (culvert cleaning or regrading swales): $150–$500 per event
Pro Tip:Before winter in freeze-thaw climates, check that drainage outlets are clear and the crown is intact. Water that pools and freezes under the surface lifts aggregate and creates heaving. A single grading pass in late fall costs far less than repairing spring frost damage.
Stabilized lots (geocell or geotextile) typically need less frequent topdressing because the confinement system reduces lateral stone migration. That reduced maintenance frequency is a meaningful part of the cost-benefit case for stabilization.
Should you use geocells or geotextile fabric?
Use geocells or HDPE confinement when you have heavy traffic, weak subgrade, or a low tolerance for ongoing maintenance costs. The up-front cost is higher, but the math usually works in their favor over a 10-year horizon.
Geocells (HDPE confinement panels):
Distribute load laterally across a wider area, reducing point pressure on weak subgrade
Can reduce total aggregate depth by 30–50% while maintaining or improving load-bearing performance
Higher material and installation cost up front
Best on soft clay soils, high-traffic commercial lots, or sites where importing extra aggregate is expensive
Geotextile fabric:
Separates subgrade from base aggregate, preventing mixing and punch-through over time
Lower cost than geocells; often used as a baseline on any lot with clay or silt subgrade
Does not improve load distribution the way geocells do, but dramatically extends base life on marginal soils
Polymer binders and mechanical stabilizers:
Applied to existing gravel surfaces to reduce dust and bind surface fines
Useful for dust control and surface hardening, not for structural improvement
Limited benefit on an under-built base
When stabilization pays off: On a weak subgrade where geocell systems reduce material depth by 30–50%, the material savings can offset the cost of the confinement system within the first few years of reduced topdressing. Run the numbers on your specific site before dismissing the up-front cost.
When to skip it: Well-drained, engineered subgrade with stable native soil and a full-depth compacted base generally does not need geocells. Decorative loose-stone areas where aesthetics matter more than load capacity also do not benefit from confinement.
Schedule Delivery in Minutes
Get Your Free Quote Today
Tell us your location, access, and estimated yardage — we’ll handle the rest
Pro Tip:Even if you skip geocells, never skip geotextile fabric on clay subgrade. It costs a fraction of the aggregate it saves over a 10-year period.
What to ask your bulk-material hauler before you order
Always specify material gradation, delivery measurement in tons, and tipping location before you confirm any order. Those three details prevent the most common delivery disputes.
Ordering checklist:
State the material by name and gradation: “dense-graded crush-and-run,” “#57 crushed limestone,” or “#411 fines mix.” Generic terms like “gravel” or “base rock” are too vague and often result in the wrong material arriving on site.
Specify tons, not cubic yards. Volume measurements vary with moisture content and settling; tons are consistent.
Include your compaction allowance (10–25%) in the tonnage request.
Confirm truck type: end-dump trucks work for most sites; belly-dump trucks cover larger areas faster but need more clearance.
State the number of loads and the delivery window. If compaction crews are on site, material needs to arrive in sequence, not all at once.
Ask about short-load fees and return policies before you sign anything.
Quality checks on delivery:
Inspect the first load before the truck leaves. Look for excess clay fines, round stone mixed into angular material, or visible contamination.
Run a handful through your fingers: crush-and-run should feel gritty and angular with fines that bind, not slick clay.
If the material does not match the spec, refuse the load and document it with photos.
Staging tip: Place and compact all base material before finish stone arrives on site. Finish stone contaminated with base fines loses its drainage performance. Keep the two materials physically separated during delivery.
Key Takeaways
A properly built gravel parking lot uses a compacted 6–8 inch crush-and-run base topped with 1.5–3 inches of #57 or #411 finish stone, placed in 4-inch compacted lifts with edge restraints and a 2% drainage slope.
Point
Details
Base depth is non-negotiable
Commercial lots require 6–8 inches of compacted flex base, increasing to 8+ inches for heavy truck traffic.
Two-layer system prevents failure
Dense-graded base plus angular top-dress outperforms any single-material approach for load and drainage.
Compaction drives longevity
Place base in 4-inch lifts and compact each before the next; uncompacted gravel settles 1–2 inches within months.
Stabilization reduces long-term cost
Geocells can cut aggregate depth by 30–50% and lower maintenance frequency on weak or clay subgrades.
Olearydevelopmentgroup delivers materials
For San Antonio-area projects, Olearydevelopmentgroup supplies crush-and-run, #57, and other parking-lot aggregates with same-day or next-day delivery.
What most contractors get wrong about gravel lots
The conventional wisdom says gravel parking lots are low-cost, low-effort builds. That framing is accurate only if you define “low-cost” as the initial invoice. The real cost of a gravel lot is the base preparation, and that is exactly where most budget pressure lands.
What I see repeatedly on job sites: owners approve a reduced base depth to cut material costs, then spend more on regrading and topdressing over the next three years than the original savings were worth. A 2-inch reduction in base depth on a 5,000 square foot lot saves maybe $800–$1,200 in material. One professional regrading visit plus a topdress load costs $600–$1,000. Do that twice and the math has already reversed.
The pragmatic tradeoffs that actually hold up: you can reduce finish stone depth from 3 inches to 1.5 inches on a low-traffic lot and recover it with a single topdress in year four. You cannot recover a thin base without tearing the lot up and starting over. Edge restraint is another small investment that most DIY builds skip. Without it, base stone migrates outward within one season and the lot loses its structural cross-section at the edges, which is exactly where vehicles track in and out.
Small pads can be built with rented equipment, but for any commercial lot over 2,000 square feet, hire a contractor for compaction and grading. The compaction protocol, specifically the number of passes per lift and the equipment weight, determines whether the base locks or stays loose. Rented plate compactors work for small residential pads; they are underpowered for a commercial base section.
Olearydevelopmentgroup delivers the materials your lot needs
Olearydevelopmentgroup supplies the full material stack for gravel parking lot construction in the San Antonio area: crush-and-run flex base, 3/4" base material, #57 and #411 finish stone, slag, and specialty aggregates, all delivered by GPS-tracked dump trucks with same-day and next-day availability. You get transparent per-load pricing, no guesswork on delivery windows, and a contractor account option with volume pricing for multi-load projects.
When you request a quote, bring your site dimensions, soil notes, and access constraints. Specify materials by gradation name, and ask about staging a base delivery ahead of your finish stone so compaction crews can work without waiting. Olearydevelopmentgroup’s team can help you calculate tonnage with the compaction allowance already built in.
Commercial parking lots need a compacted flex base of 6–8 inches for most vehicle traffic, increasing to 8+ inches for heavy trucks or equipment. Add 1.5–3 inches of finish stone on top.
What is a gravel parking lot?
A gravel parking lot is a paved surface built from compacted crushed-stone layers rather than asphalt or concrete. It uses a dense-graded structural base and an angular finish stone to carry vehicle loads and manage drainage.
How much does a small gravel parking lot cost?
A basic single-layer gravel surface typically costs $1–$3 per square foot, while a properly built multi-layer installation with base preparation and compaction generally runs $4–$10 per square foot, depending on materials and local factors.
How much gravel do I need for a 10×10 parking pad?
A 10×10 pad at a 6-inch base depth requires material quantities that vary depending on compaction and finish stone thickness; always add 15% for compaction when ordering.